Make your own clay (or plastic!) inscription inspired by the Cyrus Cylinder and an artist’s workshop at the Getty Villa
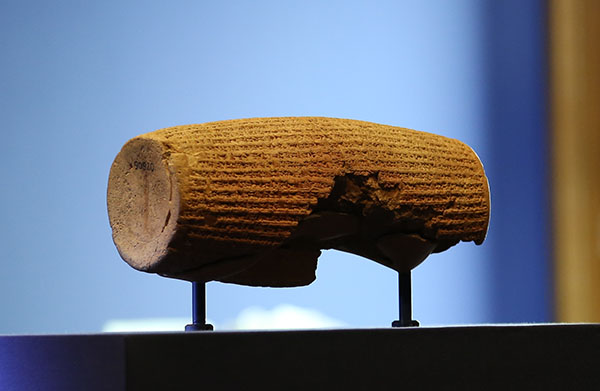
The Cyrus Cylinder (seen from the back of the case during installation at the Getty Villa), Achaemenid, after 539 B.C. Terracotta, 22.9 x 10 cm. The British Museum
The pairing of clay with language is part of the long history of ceramics. The ease with which wet clay can be marked upon, and fired clay’s potential lifespan of thousands of years, made it an ideal substrate for recording important information before the invention of paper.
This was especially true for the Cyrus Cylinder, which recorded for posterity the achievements of the Persian conqueror Cyrus the Great. Discovered under the ancient city walls of Babylon and written in the Old Babylonian language in cuneiform script, the Cyrus Cylinder is a testament to the power of the written word to communicate across time.
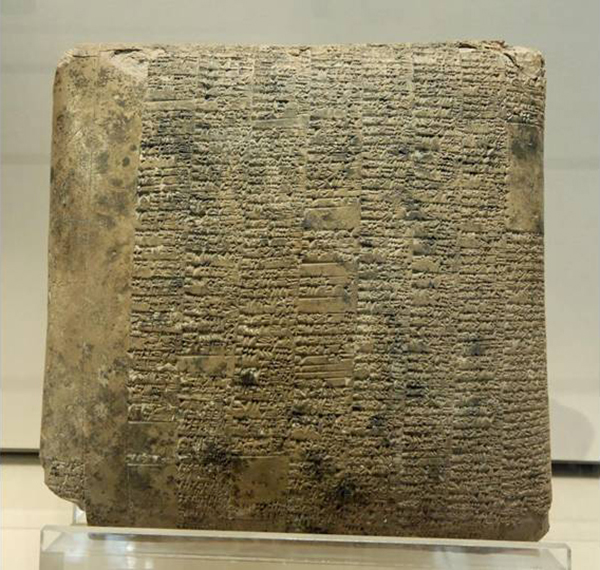
Pre-Excel record-keeping: Mesopotamian clay tablet inscribed with the annual balance sheet of a state-owned farm, with a detailed account of raw materials and workdays for a basketry workshop, ca. 2040 B.C. (Ur III). Clay. Musée du Louvre
However, not all ancient clay inscriptions were created as permanent historical records. Some of the ancient tablets now housed in museum collections around the world recorded daily minutiae and transactions, like the paper receipts of today. Clay tablets such as these could actually be “recycled,” since unfired clay can be made soft again with the addition of water. It has been speculated that some of the ledger tablets that survived the test of time might have been accidentally “fired” during periods of warfare or natural disaster.
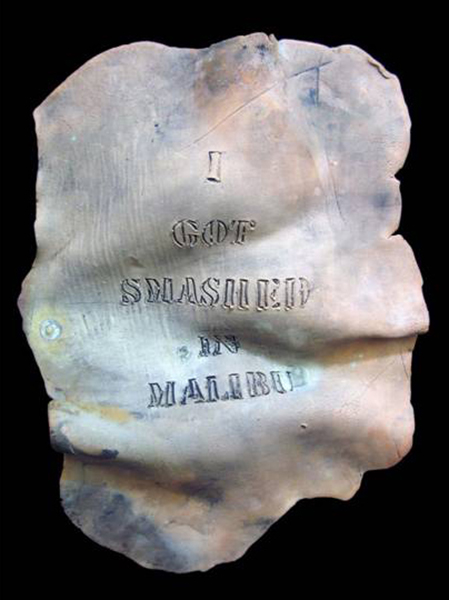
Smashed in Malibu, 2008, Anna Mayer. Pit-fired ceramic slab with text. Courtesy of the artist
To get a contemporary artist’s perspective on the Cyrus Cylinder, the Education Department at the Getty Villa recently invited Los Angeles-based artist Anna Mayer to lead a studio workshop pairing writing and clay. Anna creates conceptual ceramic works inscribed with text (see an example above), and is inspired by ancient foundation deposits and ritual objects such as incantation bowls. The workshop was an opportunity for adult learners to get their hands dirty and to compose a text that they wanted to preserve in fired clay.
In the galleries, Anna and the workshop participants explored the Cylinder’s material properties, its construction, and shape. Cyrus the Great’s proclamation was inscribed with a reed into wet clay; we can still see the ruled lines that guided the scribe’s writing. A clay slab was fashioned around a solid terracotta core, forming a cylindrical or barrel-shaped object slightly tapered at the ends. It remains unknown why this barrel shape was used for this and other ancient inscribed text dedications—did it provide more structural stability, or was it an auspicious shape, as Dr. John Curtis of the British Museum recently suggested?
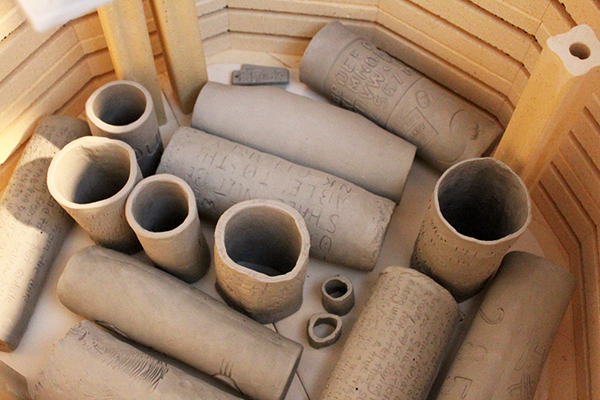
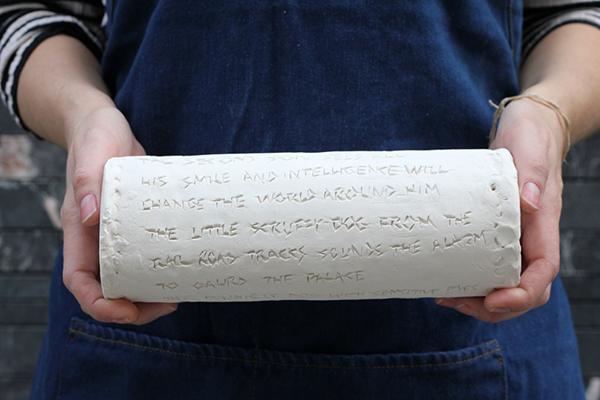
The workshop participants created hollow cylinders, which dry and fire more evenly. The text dedications ranged from epic proclamations (in the style of a great leader) to personal musings in languages including English, Armenian, Spanish, and Chinese. The cylinders were made with low-fire clay and were bisque-fired in an electric kiln, or oven. Like the Cyrus Cylinder, our cylinders were left unglazed. In ancient Persia, kilns could be made out of mud or built into a hillside, burning wood and other natural materials to reach the high temperatures needed to transform clay into ceramics
Here’s a step-by-step look at the process of creating a contemporary inscribed clay cylinder, which anyone can do with a few simple materials.
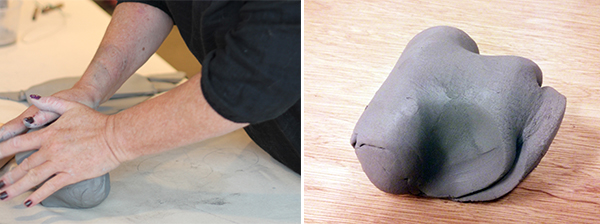
1. Wedge and Slab the Clay
First, it’s important to wedge (knead) the clay to remove air bubbles. Wedging the clay results in a ram’s-head shape. The prepared clay can then be formed into slabs, which are uniformly thick, flat pieces of clay.
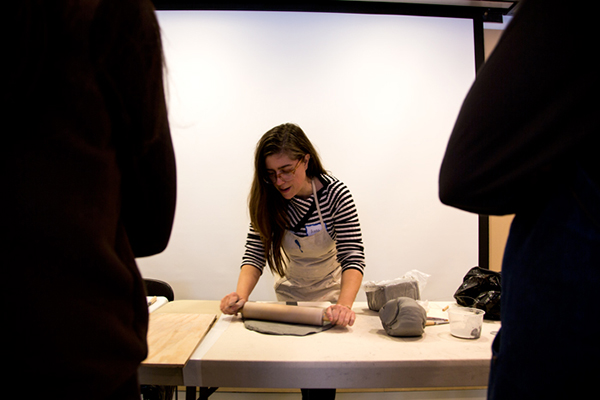
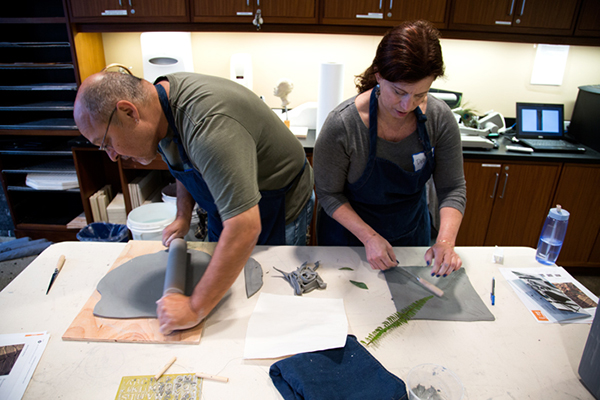
Slabs can be formed using a combination of pounding, throwing strategically onto a flat surface, and rolling the clay with a rolling pin.
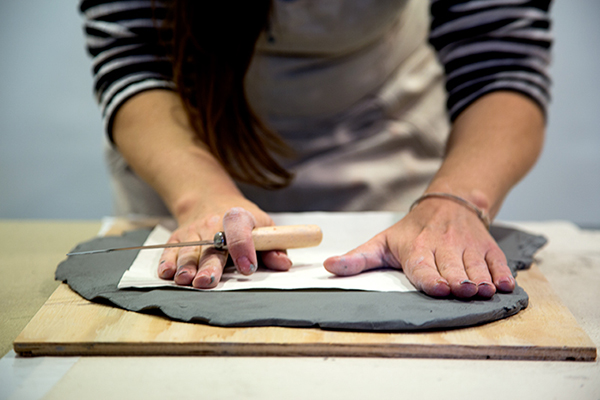
It’s helpful to use a rectangular paper template to cut out your slab with a fettling knife.
2. Inscribe the Clay
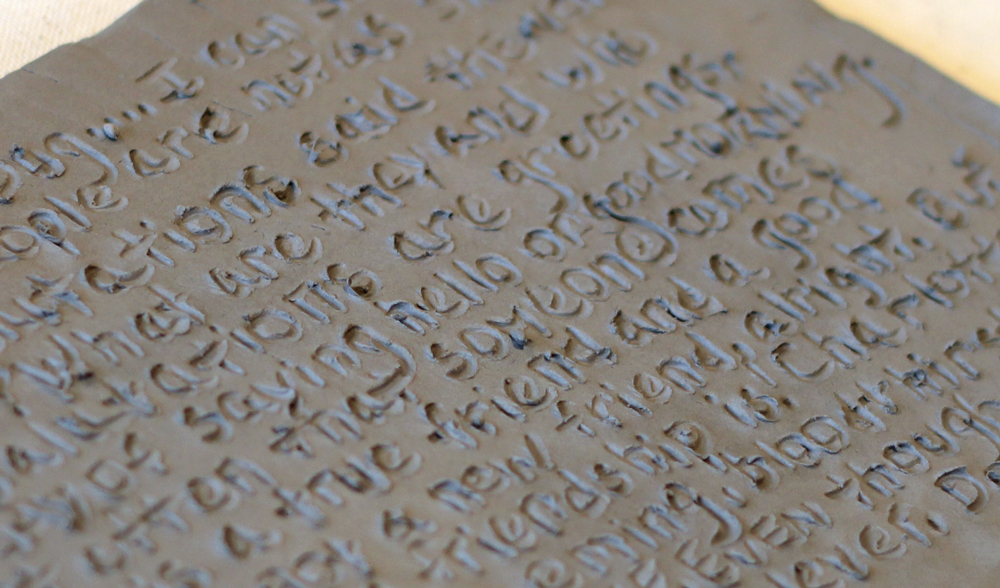
You can then inscribe the slab with any text you’ve written; you can even write a stream-of-consciousness flow of thoughts in the clay. Use letter stencils or your own freeform handwriting. Ballpoint pens are readily available inscription tools. You can also form letters with the tip of a fettling knife.
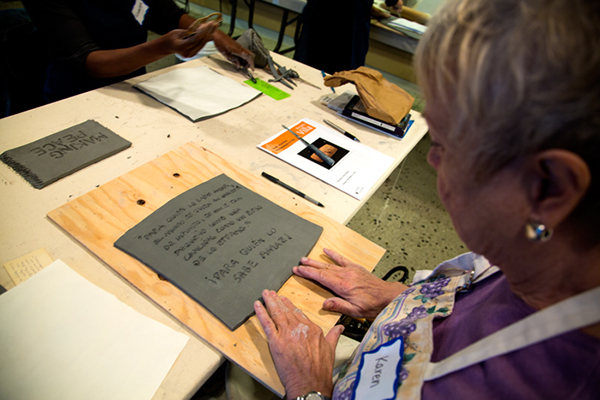
3. Roll Your Cylinder
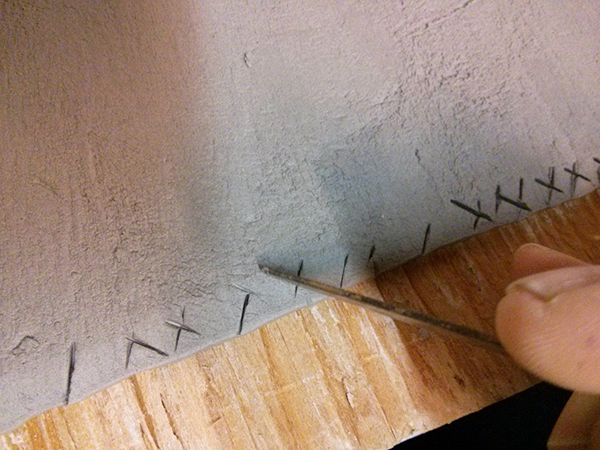
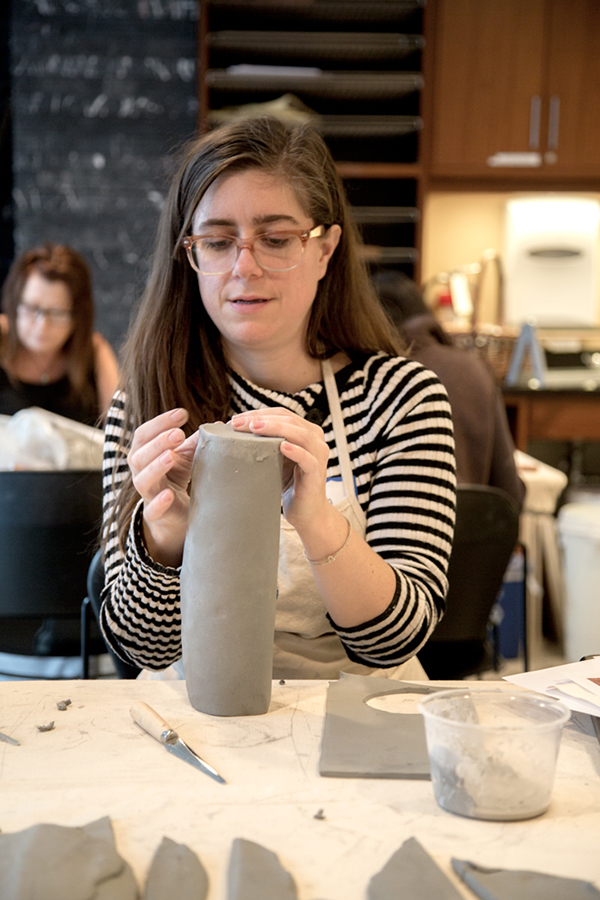
Now form the slab into a cylinder by wrapping it around a rolling pin and joining together the edges with the “slip and score” method. To slip and score, lightly crosshatch the clay and then apply a small amount of slip (a mixture of water and wet clay) to the edges that will be joined.
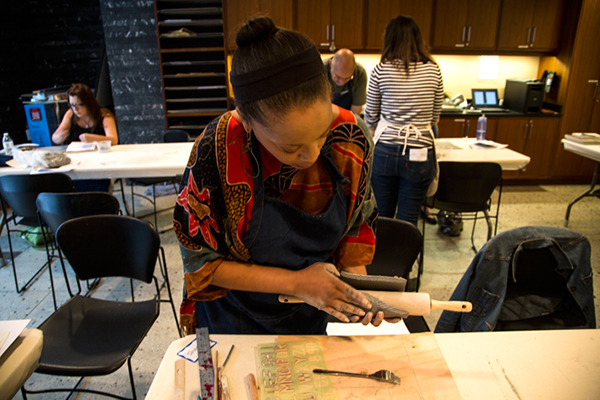
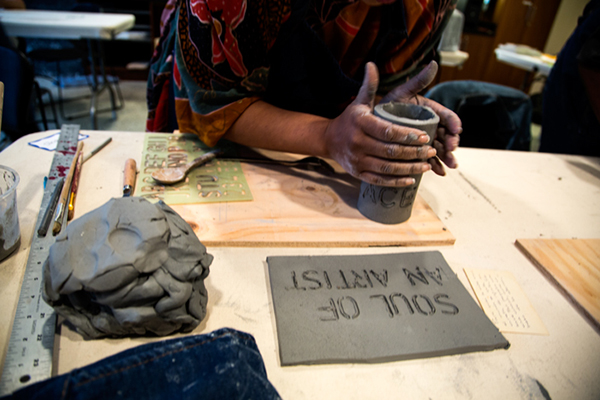
Consider making cylinders of different sizes, or making one that uses stenciled text and one with a proclamation that’s been handwritten. You can also cap the ends of your cylinder by standing the cylinder upright on each end on top of a slab and cutting out two corresponding circles. You can then slip and score the edges to be joined.
4. Prepare for Firing
If you’ve capped the ends of your cylinder to make an enclosed form, you will need to make two or three small holes that go all the way through the walls of your object. This prevents the object from cracking from air pressure during the firing process, making success in the kiln much more likely.
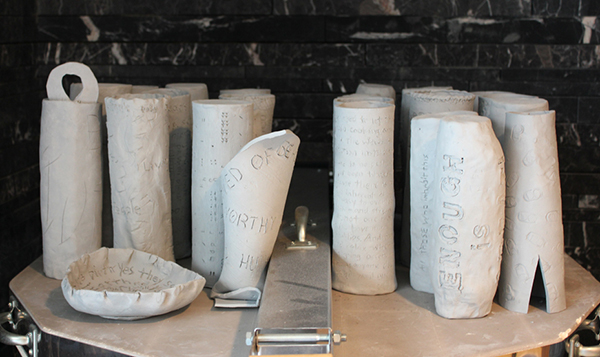
Prepare all objects for drying and being fired. You may want to wrap plastic around “slip and scored” spots to ensure even drying.
5. Fire in the Kiln—And Enjoy
We slow-fired our clay cylinders in a kiln for about two days. After that, they were complete!
If you are looking for a quicker method to make your own cylinder, here’s a tip. Rather than making a proclamation in the age-old material of clay, how about writing your daily thoughts on a disposable plastic cup? Anna “inscribed” this contemporary vessel with a stream-of-consciousness list of all of the things she was trying to avoid one morning.
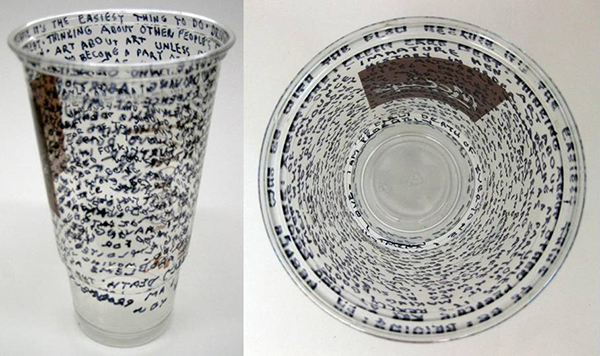
Aggressive Magic, 2008, Anna Mayer. Large iced coffee cup, ink. Courtesy of the artist
Whatever material you use, when you make your own cylinder you are participating in a millennia-old tradition, and making it your own.
The Cyrus Cylinder and Ancient Persia: A New Beginning is on view at the Getty Villa through December 8, 2013.



It was indeed a fantastic workshop ! Thank you much for everything !