The 13th-century illuminated manuscript known as the Abbey Bible recently joined the collection of the Getty Museum—and when the special book arrived, the task of documenting it fell to me.
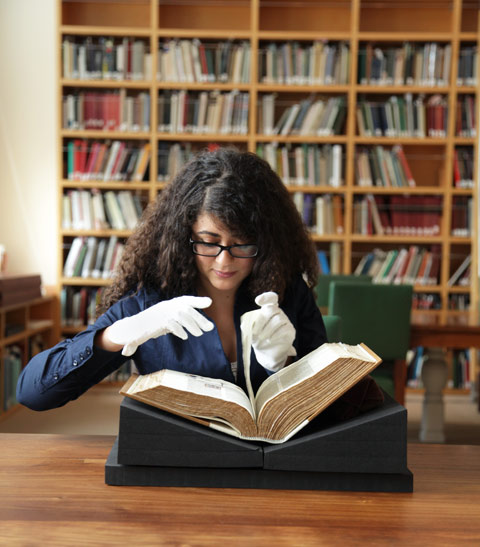
This meant I had to spend a lot of time with the manuscript, recording everything about it. I was excited to be turning the pages of a book that’s more than 750 years old—even though this caused me to hold my breath with apprehension some of the time!
During the weeks we spent together, I was not only admiring the bible’s exquisite beauty, but also doing a lot of titling, counting, and recounting. With manuscripts, it’s not simply a single beautiful image or work of art that makes the book significant; each page, as an independent surface, has the potential to stand as its own individual masterpiece.
The Abbey Bible contains many gorgeous images, to which I assigned titles based on their content—such as The Death of Moses and the Call of Joshua and A King Directing a Mason. However, not only the gorgeous imagery and sparkling pictures receive titles; the text pages do, too. I needed to give every single page a title and, needless to say, the process was time-consuming. As this manuscript is a bible, there are many pages that only have text on them. I creatively labeled these instances as “Text Page.” There are 851 text pages in the Abbey Bible.
One page in the bible presented an interesting labeling encounter: While writing the page, the original scribe noticed he had omitted verses 7–26 from Chapter 1 of the book of 1 Kings. Since this was a large error, the scribe decided to cancel the entire page and start a new folio instead, repeating all the text prior to the omission and completing the page. To maintain a sense of aesthetic harmony in the wake of a mistake, the scribe struck through both text columns with perfectly ruled red and blue lines to match the pen flourishes seen throughout the book, and the artist added the originally planned decoration.
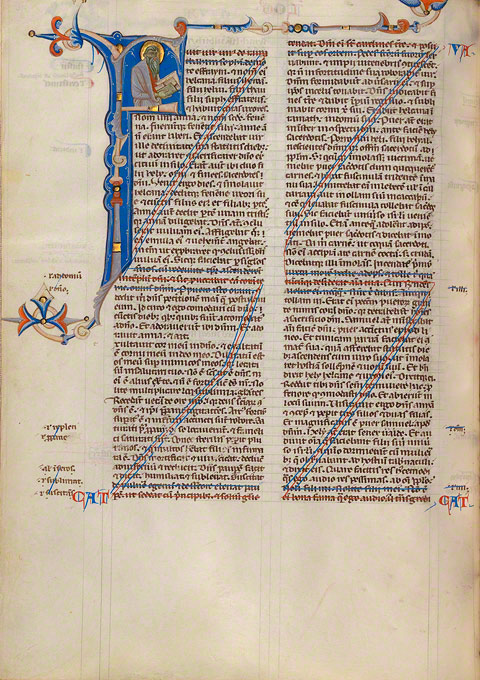
Decorated Canceled Page (folio 96v) in the Abbey Bible, Italian (probably Bologna), about 1250–1262. Tempera and gold leaf on parchment, each page 10 9/16 x 7 3/4 in. The J. Paul Getty Museum, Ms. 107.96v
After finishing the titling of all the pages, I counted and recorded all the different instances of decoration, which amounted to some pretty spectacular numbers. I went through 518 folios (1,036 pages), which featured: 95 historiated initials (large letter forms with enclosed identifiable narratives or figures), 39 decorated initials, and 80 pages with marginal scenes. The text was arranged in two columns on every page, with 49 lines of text per page.
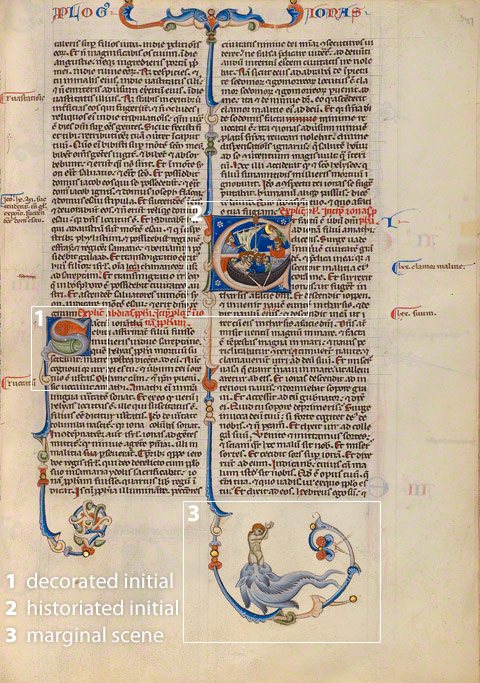
Diagram of elements on a page of the Abbey Bible (Initial E: Jonah, folio 347). The J. Paul Getty Museum, Ms. 107.347
After confirming that all my numbers were correct, I helped prepare the manuscript for the next phase of its documentation: photography.
Bound books, as you can imagine, present a problem when it comes to conventional photography since they aren’t flat, and since they may also have a fragile binding. The Museum’s Imaging Services Department uses an elaborate cradling system to take photographs of manuscripts in the collection, both for documentation and publication purposes.
This cradle provides support for the bindings of the precious books and allows for the best possible alignment of the camera’s lens with the page. The main parts of this device are two flat surfaces that can slide independently of one another, and also fold up to create a small gap that accommodates a book’s binding at an angle that supports the two sides of the book. Therefore, this device “cradles” the book and keeps it secure while we photograph it.
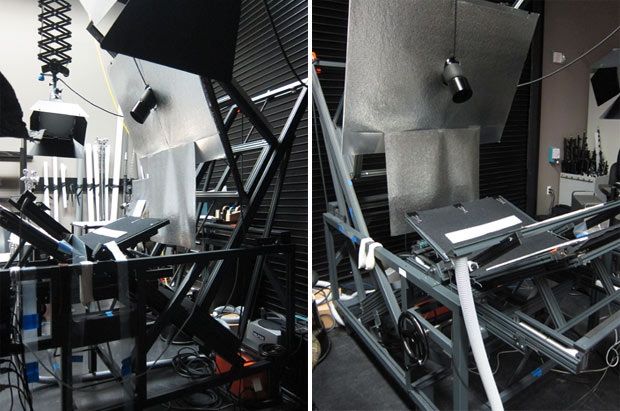
Behind the scenes in the photography studio, showing the cradle and lights used to photograph manuscripts. This cradle system was designed by conservator Manfred Mayer of the University Library of Graz, Austria, with the careful handling of rare books as the primary design concern. It was purchased from ICAM Archive Systems.
To begin the process, we position the book onto the cradle so that it remains open (usually no more than 120 degrees—and sometimes less!) and ensure that the binding is supported. We then put the particular page being photographed onto a bar that provides a slight suction to hold the page taut, gently eliminating any wrinkles or cusps that often naturally occur in the page. Finally, we double-check its position with a laser beam to verify that the page is as straight as possible and lies parallel to the camera lens.
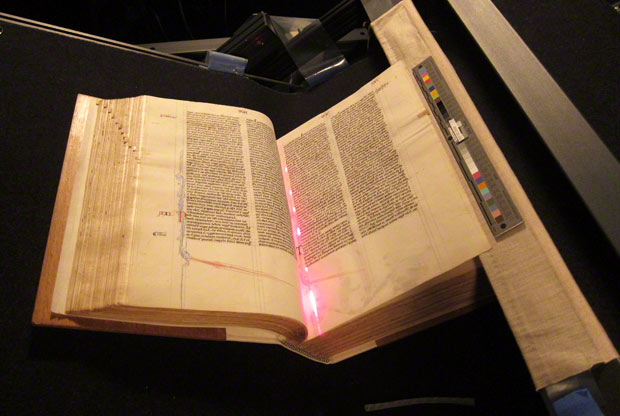
The Abbey Bible in the cradle for photography. A laser beam is used to ensure that the page is parallel to the camera lens.
Manuscripts pose an interesting challenge because they are often embellished with gold leaf and/or silver so that they shimmer. Translating the visual effect of this metallic surface into the photograph requires a second, separate shot. While the first shot has lights positioned to either side of the manuscript and records all the basic information of the flat page, the second shot (we like to call it the “gold shot”) captures the radiance of the illumination: light is bounced off of a reflective board that is directed toward the page, lighting up the entire surface.
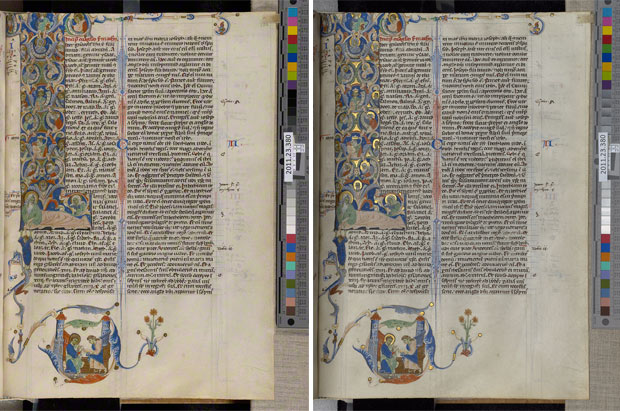
Two views of the same page (Initial L: The Tree of Jesse, folio 380) from the Abbey Bible. Compare the first shot at left, lit from both sides, with the second shot at right, the “gold shot” using light bounced off a reflective surface. The two exposures produce distinctive images.
In order to produce a seamless final product, it’s important that the pages do not move a single hair between the two shots. A professional technician digitally weaves the two shots together to create the final image of the page as you see it here, capturing the magical radiance of the page along with all of its delicate details and spectacular coloring.
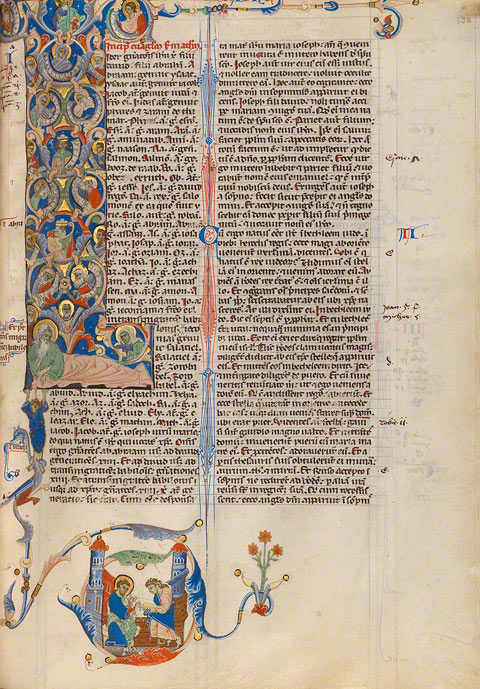
Initial L: The Tree of Jesse (folio 380) from the Abbey Bible. This is the final, color-corrected image, woven together by an imaging technician.
And then turn we turn the page and do it all over again. One down…1,035 to go.


Such a beautiful and informative article. Thanks for including the “mistake” pages and showing the cradling apparatus for photography—I’ve often wondered how that was accomplished.
I’ve never seen columns of text so beautifully deleted before! Thanks for the informative piece.